But first a house update…
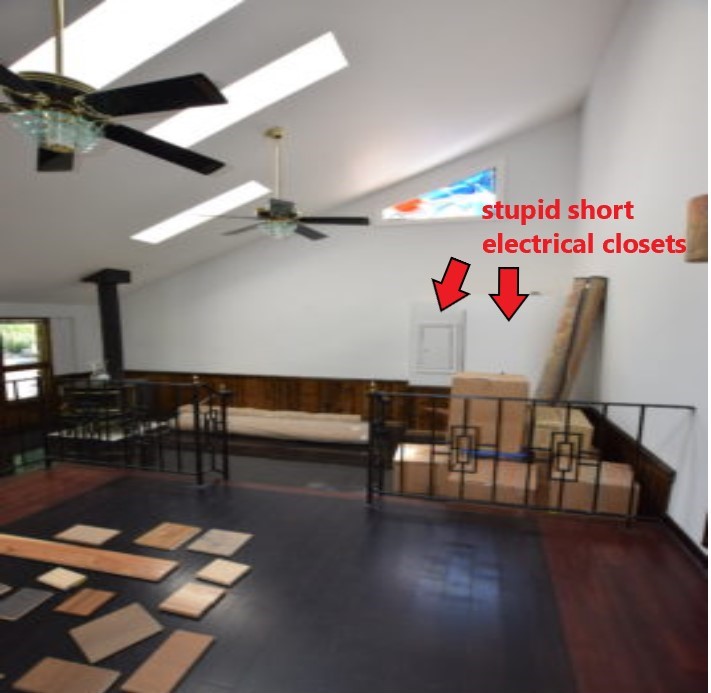
Still a whirlwind here at my new home the construction site. Over the past weeks we had electricians moving several electrical panels from various places across the home to the garage. While this wasn’t an absolute necessity, we believe that it will pay off in the long run for two reasons. First, it will allow all wiring to be run in the basement in one new soffit right alongside the HVAC ducts. Previously the wires were a spaghetti mess above the drop ceiling in the basement, but since the basement ceiling is currently pulled out it made sense fix it properly now. Second, it means we can remove both non-code compliant electrical “closets” that had been fashioned to hide the previous panels in the family room. While they technically did their job at hiding the panels, they were not aesthetically pleasing to look at and seriously messed with the flow and looks of the rooms.
Other new developments include our receipt of a proposal to remove both loadbearing and non-loadbearing walls so we can rework the floorplan on the home’s main level. More to come on that soon! In the interim more deconstruction continues in the basement including continued removal of wood paneling, drop ceiling and carpet. Dead mouse count is up to 56! In addition to the removal of the walls, we’ve consulted with a plumber to talk about how to untangle the spaghetti of Pex plumbing that used to be in the basement drop ceiling, removal of the old wet bar drain, and how to ready the new kitchen area for plumbing including a gas line for the range (I’m hoping there is budget for a big professional grade range).
DIY Minecraft Mural
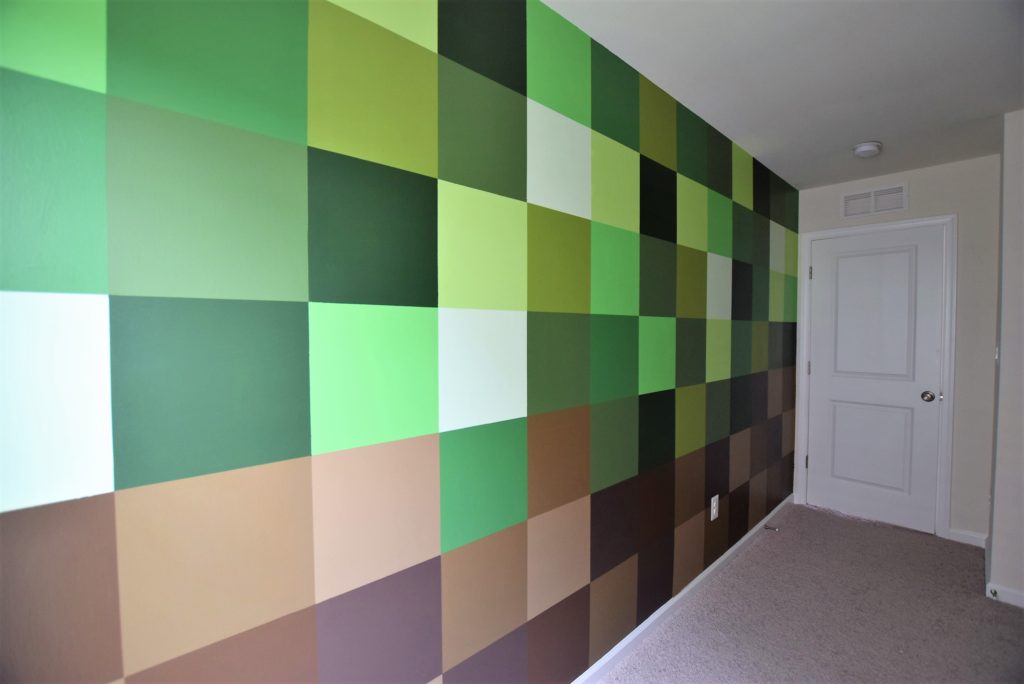
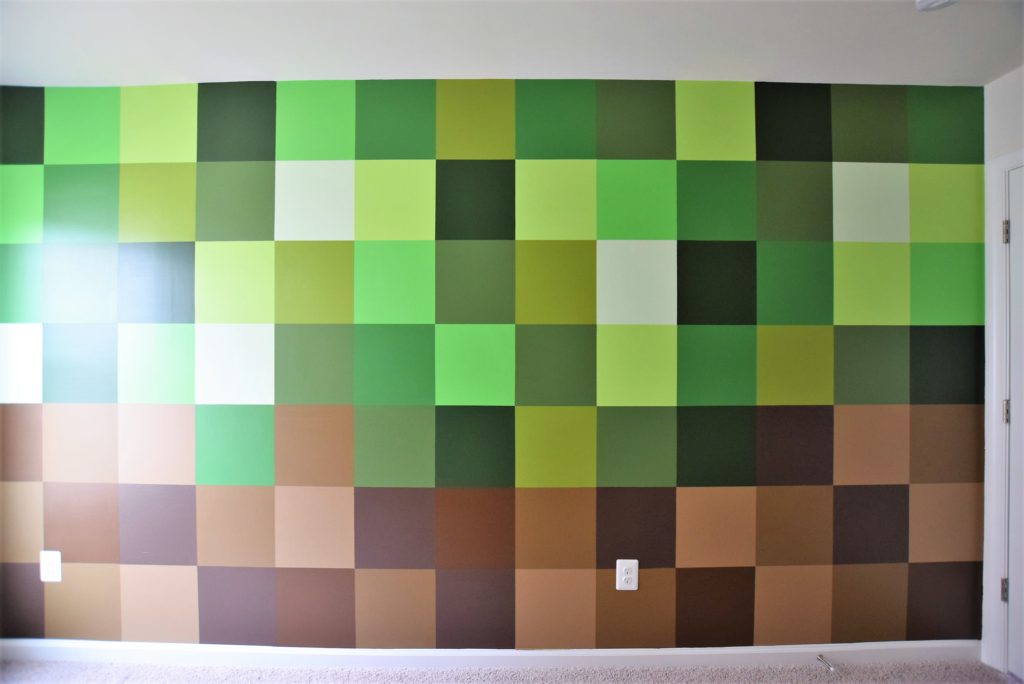
I really wish we were further along than we currently are. Renovation always seems to be so much simpler and quicker in your mind than what reality dictates. HGTV makes it look so easy! I could maybe get a bit more done on our home reno if I wasn’t so busy with design projects for my business, but this is a problem I can’t complain about! Here’s a recent project that I wanted to share. I recently did a custom geometric mural painting for a client’s new home. Their son is a huge Minecraft fanatic. Rather than pick one paint color for his bedroom, I proposed 12 colors! That’s right, TWELVE, that take the shape of that tell-tale Minecraft cube pattern. All 12 colors were in the shades of green and brown and when finished have the look of Minecraft dirt and grass. The great thing about this geometric mural is that it could be done in a variety of colors depending on what your child likes most about the game. Shades of grey for rock, grey and black and spots of red for spider, shades of blue for water, you get the idea. It’s actually pretty easy to recreate with a little patience, skilled use of a level and lots, scratch that, TONS of painter’s tape.
Materials
Here are all the materials I used:
- 12 quarts of Benjamin Moore paint in the following colors:
- 554 Easter Hunt
- 406 Huntingdon Green
- 417 Feel the Energy
- 558 Killala Green
- 553 Richmond Green
- 546 Courtyard Green
- 1596 Nightfall
- 455 Sweet Basil
- HC 68 Middlebury Brown
- 1057 Maple Valley
- 1055 Algonquian Trail
- 1029 Coconut Grove
- A yardstick, and a tape measure
- A long (3-4 foot) level (if your wall is smaller you might be able to get by with a laser level, but I’ve always found they get more inaccurate the longer your wall)
- About 6 rolls of painter’s tape
- Pencils and erasers
- One 1.5” paintbrush per color plus 1 or 2 small detail brushes
- Drop cloths, paper towels, rags, etc.
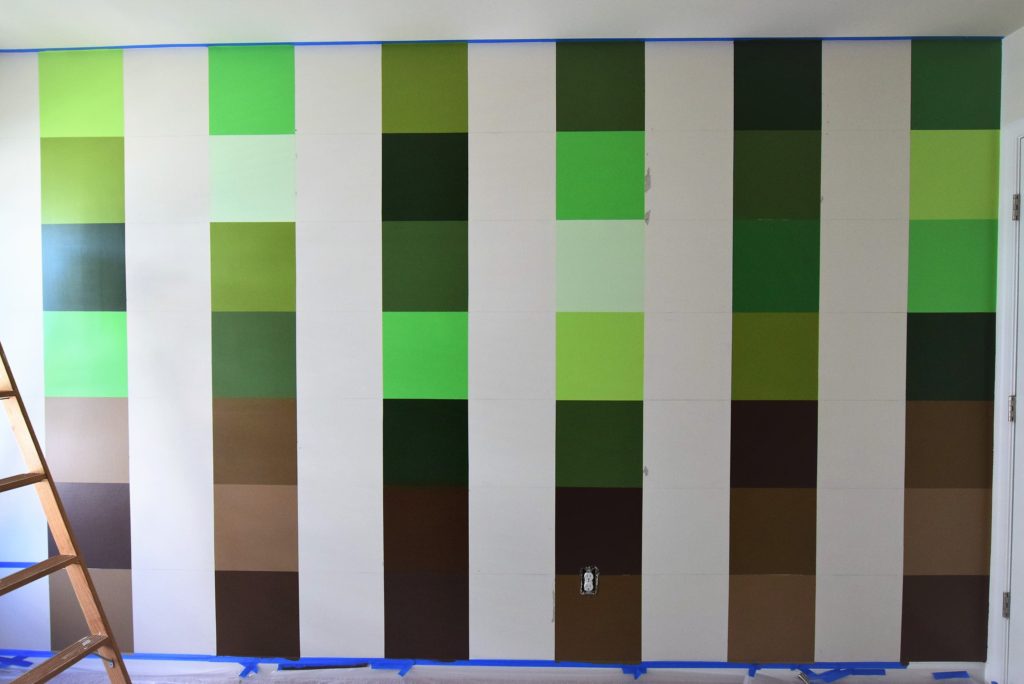
How-to DIY Minecraft Wall
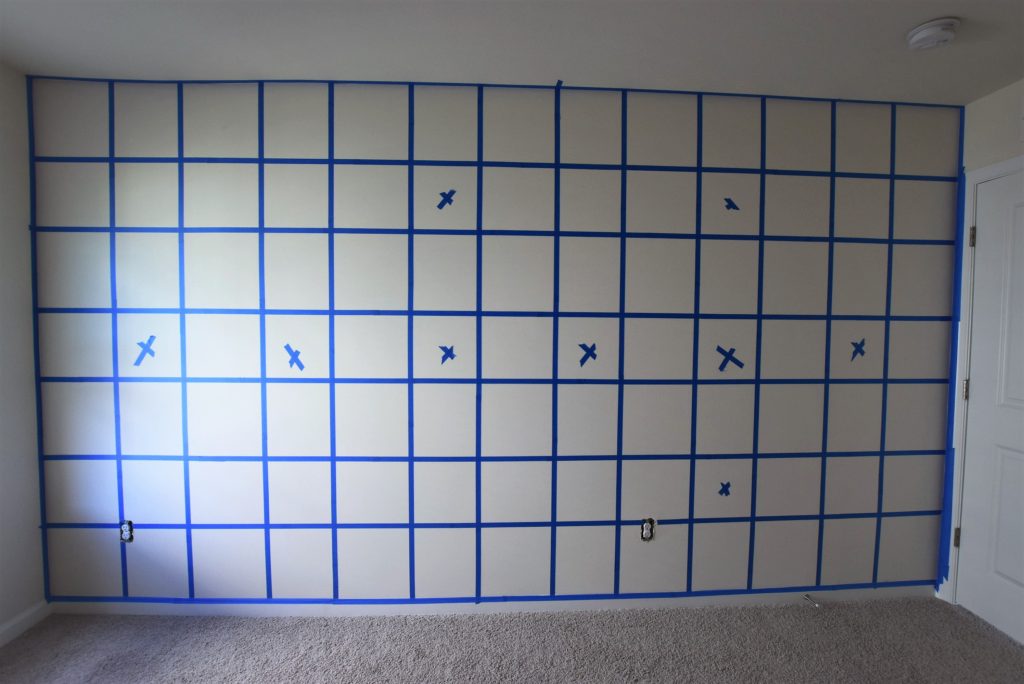
First, I needed to determine how many squares I could fit across and vertically on the wall so that I didn’t end up with partial blocks on any edge. To start with, I knew that I wanted large-ish blocks that were about 12 x 12 inches each. So I took the overall length and height of the wall and divided by different figures until I ended up with something that was evenly divisible in both directions. In this case it meant blocks that were about 13 x 13. Is there likely a mathematical proportional equation that could have figured this out the “right” way, sure probably, but this way just seemed logical in my head, so that’s what I did.
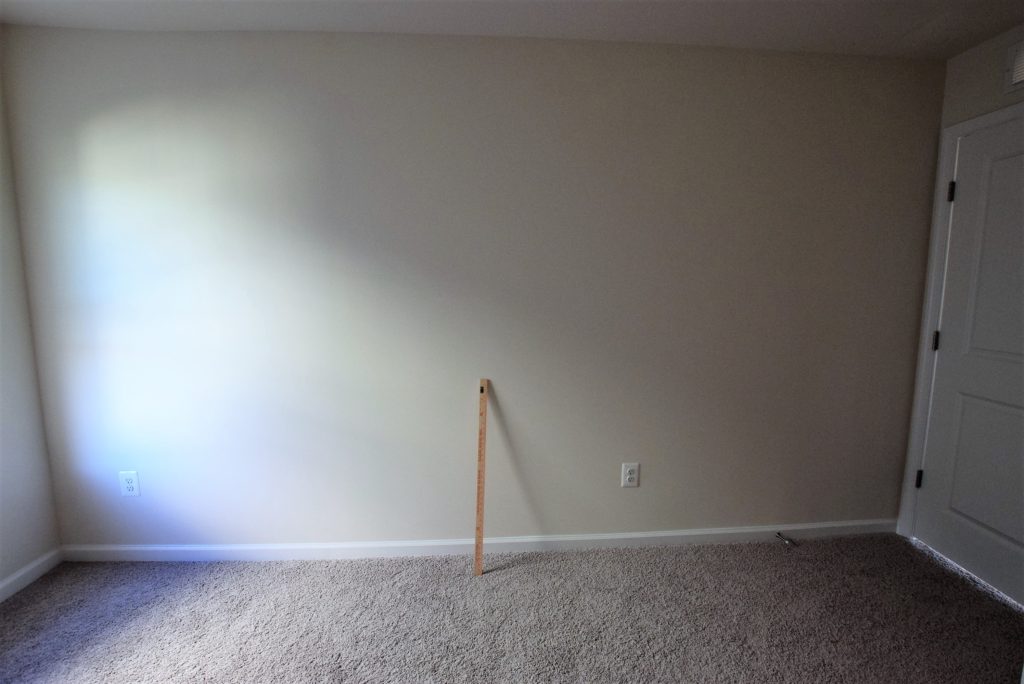
Once I knew how large each block would be I took my yardstick and measured every 13 inches along the bottom of the wall and made a small pencil tick mark. I did the same thing going up the left and right sides and along the top. Then, I took my level and made intermediate horizontal tick marks 1/3 up the wall and 2/3 up the wall. Next, I used the level to connect the dots to make a perfectly straight grid pattern both horizontally and vertically. Everyone knows homes’ walls are never perfectly straight, so every now and then I’d step back to make sure it looked about right.
Next, it was time to tape. I began with taping on the ceiling, baseboards and the adjoining walls first since those pieces of tape will stay put for the entire project. Then I began taping on the left edge of each vertical line and on the top edge of each horizontal line. Because of where you have to tape, at any given point you can only paint a quarter of the wall’s squares. Starting off because the squares looked so similar (everything white with blue painter’s tape) I placed some blue tape “x’s” on the squares I should NOT paint so I could keep track. In the current formation I painted every other bottom square, every other square on the 3rd row, 5th row, and so on. I didn’t use a specific pattern for where to put what colors, but had a few rules I followed to keep it looking like true Minecraft. I kept the bottom 2 rows completely brown. The third row from the baseboard was a mix of brown and green and the rest of the cubes above that third row were green. I never put the same exact color directly adjacent to itself. The same color diagonally was acceptable.
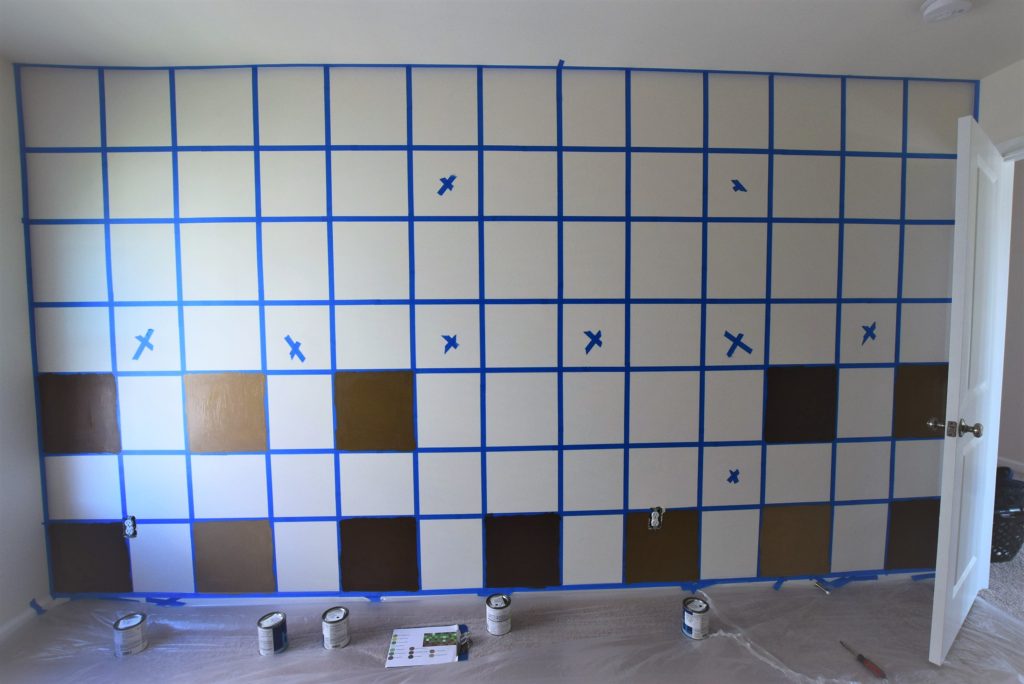
After my first coat was dry I went back and gave a 2nd coat to those squares then removed the tape. I used a brush to do all of this painting for a few reasons. Brushes, while they required a slower and more methodical stroke, minimized bleeding under the tape. Also, utilizing 12 different mini rollers and pans could get expensive and unwieldy. Every time I finished with a brush, I’d return it to its own plastic bag to keep the paint moist. Hint: If you have a painting project that will take more than 1 day place your brush or roller in a plastic bag, seal it, then put it in the fridge overnight. Only do this with latex paints. Other more odious products can ruin food. Believe me, I know firsthand.
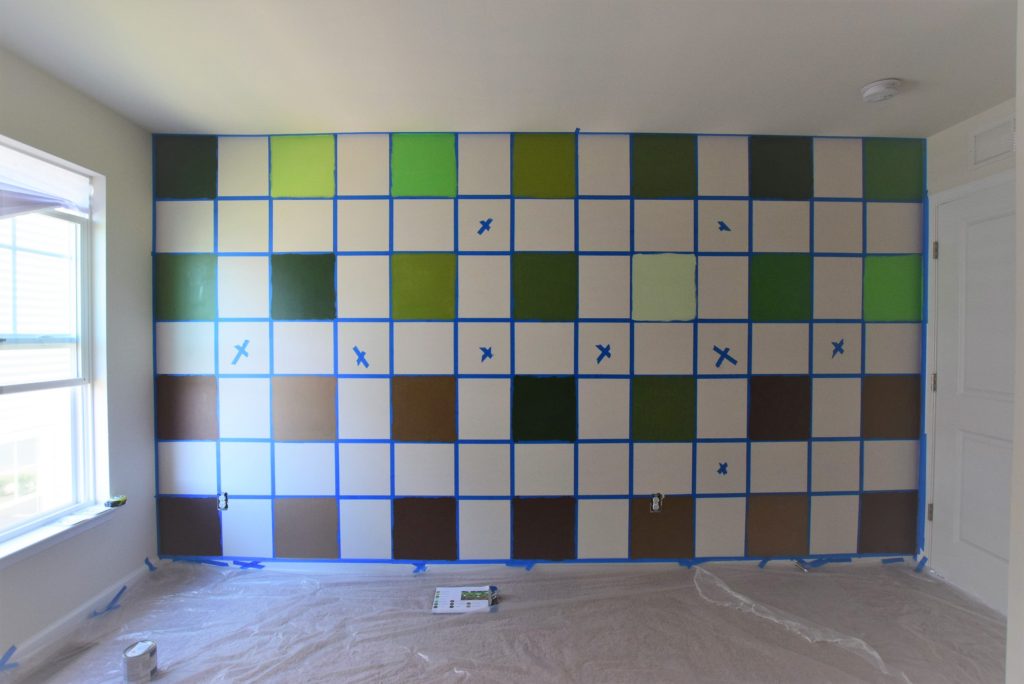
Once the first set of cubes was completely dry, I re-taped on the opposite edges and painted the isolated squares with 2 coats, then removed tape, let dry, and re-taped. I repeated this process until all squares were completely painted. Inevitably there were some areas where either the paint bled under tape or the tape overlapped too much leaving white to shine through. I had to go back and touch up these areas with a small detail brush. Finally, I removed all the border tape along the ceiling and baseboards, and voila, Minecraft wall accomplished! This project took about 2.5 days to complete. It helps to be able to ventilate the room with fresh air provided it’s not humid or raining outside and a fan to help speed up the drying time between tapings.
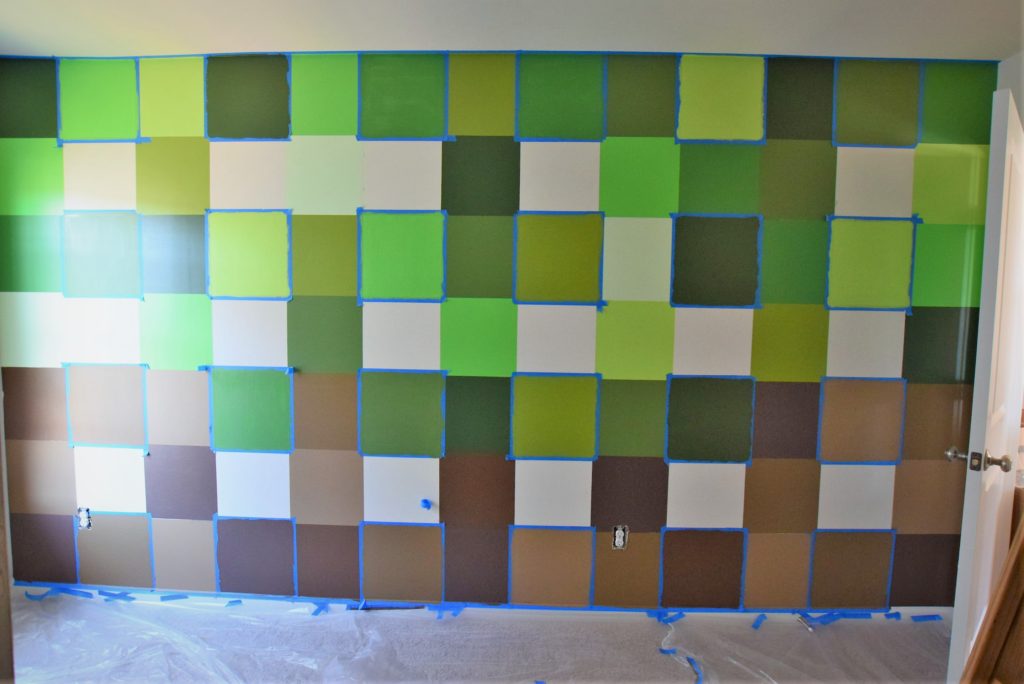
My Minecraft fan hadn’t fully moved in yet, but once his room is complete I hope to be able to share the entire look here! Here is the finished wall: